
Profile settings (streaming effects)
To deliver Profile effects to OBS or Discord, first enable Advanced Streaming Mode (mix output) in Settings → Audio Routing and select the microphone and Stream Output. This route mixes the processed microphone with BGM/accompaniment. Normal Playback does not process and deliver the microphone through this route.
A Profile is a reusable vocal-effect setup that stores the effects, parameters, enabled states and order of a Signal Chain. This chapter covers effect editing, audition, song tags, factory Profiles and VST3.
Microphone → Profile effect chain → Mix with BGM/accompaniment → Stream Output → OBS / Discord
Normal Playback retains BGM/accompaniment playback and lyric/set-list features. Advanced mode also processes the microphone and creates the mix. A vocal Profile processes the microphone, not accompaniment through the same chain. Monitor is your listening path; OBS/Discord receive Stream Output.
Create and edit voice Profiles
A Profile is a reusable vocal effect chain. Add built-in effects or VST3 plug-ins, drag blocks into processing order, bypass individual blocks, and audition the result before saving.
What the Profile editor saves
- Every block’s enabled state, parameters, and processing order are stored with the Profile and restored when the project opens again.
- Built-in effects and VST3 plug-ins can be combined, with up to eight VST3 slots. The plug-in parameter state is stored with the Profile.
- Dragging a block changes the real processing order. Bypass temporarily skips an effect without deleting its settings.
- With monitoring enabled, the Profile editor plays the Profile currently being edited. You can keep accompaniment playing while adjusting effects. Press S (Solo) at the upper right when you want to hear only the Profile preview. Returning to Live Control, minimizing to the tray, or closing the editor leaves audition and restores the previous live-monitoring route.
- Factory Profiles are practical starting points; tune them for the microphone, room noise, vocal range, and singing style before saving a personal Profile.
A safe starting order
Start from a Factory Profile; you do not need every effect. When building your own chain, use this as a practical starting point:
Input Gain → Background Attenuation → Noise Gate → Compressor → EQ → Saturation/Air (optional) → De-esser → Delay/Reverb/Shimmer (optional) → Limiter
Calibrate and clean first, stabilize dynamics and tone in the middle, put space effects near the end, and let Limiter catch only occasional peaks. Add one effect at a time and compare Bypass; remove it if it does not improve the sound.
Factory Profiles included in 2.1
Factory Profiles are live-performance starting points, not fixed mastering presets. Duplicate one and tune it for the microphone, room, vocal range, and performance style.
| Profile shown in the app | Intended starting point |
|---|---|
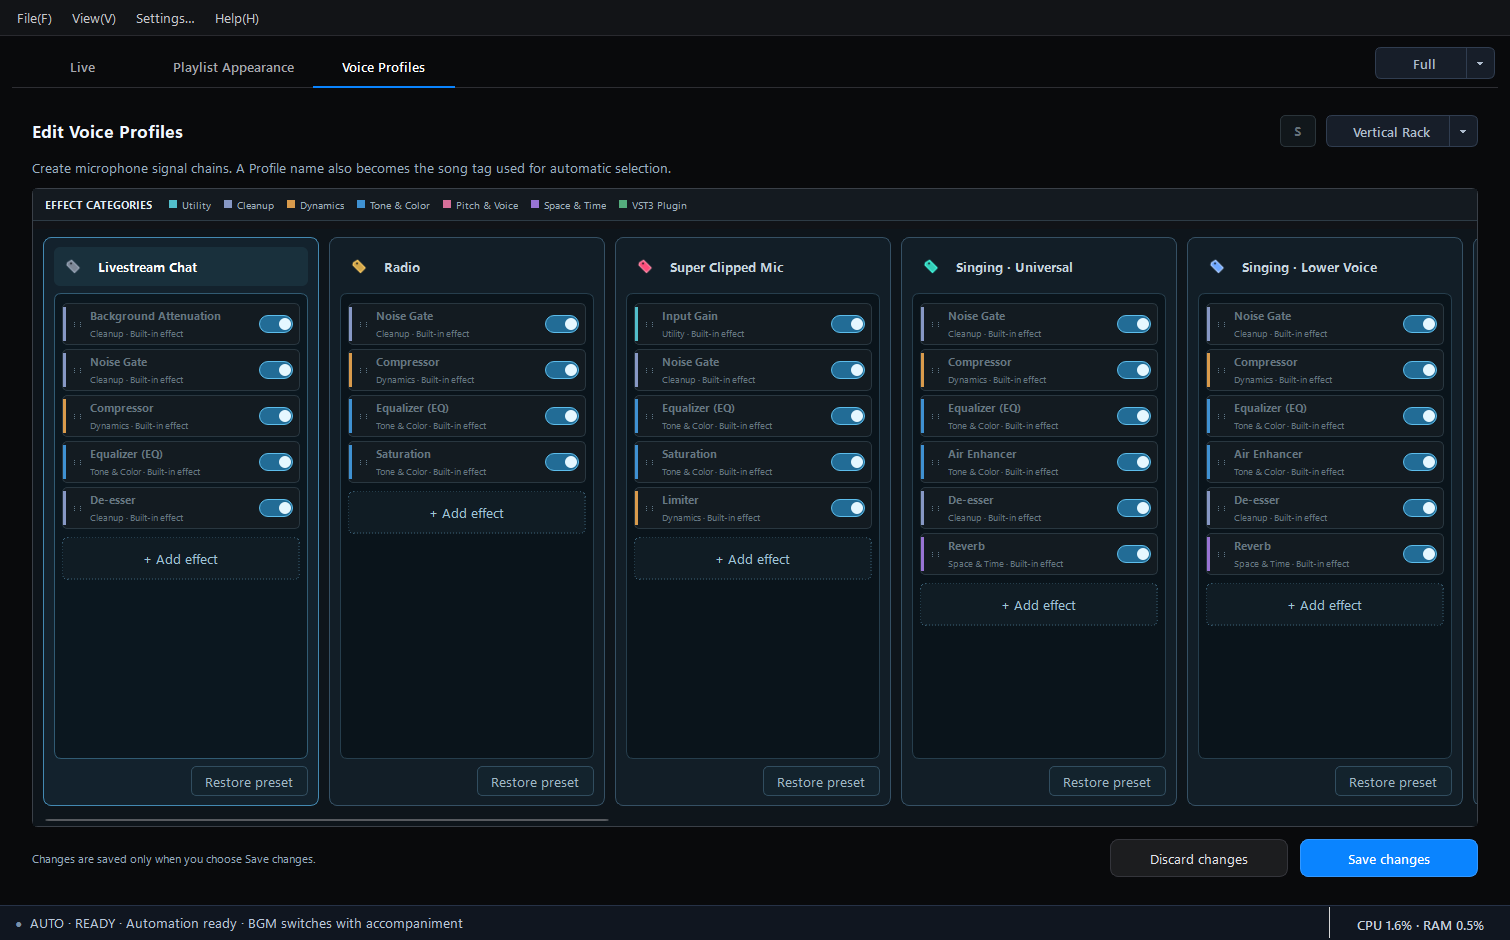
| Livestream Chat | Natural speech with restrained cleanup and dynamics for chat between songs. |
| Radio | Band-limited, compressed, lightly saturated radio/telephone color. |
| Super Clipped Mic | A deliberately overloaded comedy effect, with Gate and Limiter protection around it. |
| Singing · Universal | Conservative, clear all-purpose singing chain. |
| Singing · Lower Voice | EQ, dynamics, and Air balance shaped for a lower range; not a gender restriction. |
| Singing · Higher Voice | Keeps a higher range present while controlling harshness; not a gender restriction. |
| Singing · Vocal Double | Short delay and slight detune add thickness and width while the lead stays centered. |
| Singing · Ethereal Vocal | Air, long ambience, and restrained Shimmer for floating sections. |
| Singing · Ancient-style | Longer, airy ambience that keeps lyric attacks intelligible. |
| Singing · Rock | Firmer Gate, compression, and controlled saturation for presence and weight. |
| Singing · KTV | Familiar Delay/Echo plus Reverb singing space. |
| Singing · Bathroom | Short, bright reflections that suggest a tiled room. |
Fifteen built-in vocal effects
Every built-in effect provides a live graph, Bypass control, and Help button. Simple mode starts from a useful scenario; Advanced mode exposes the complete parameter set.
How One Knob worksQuick control without hiding the real parameters
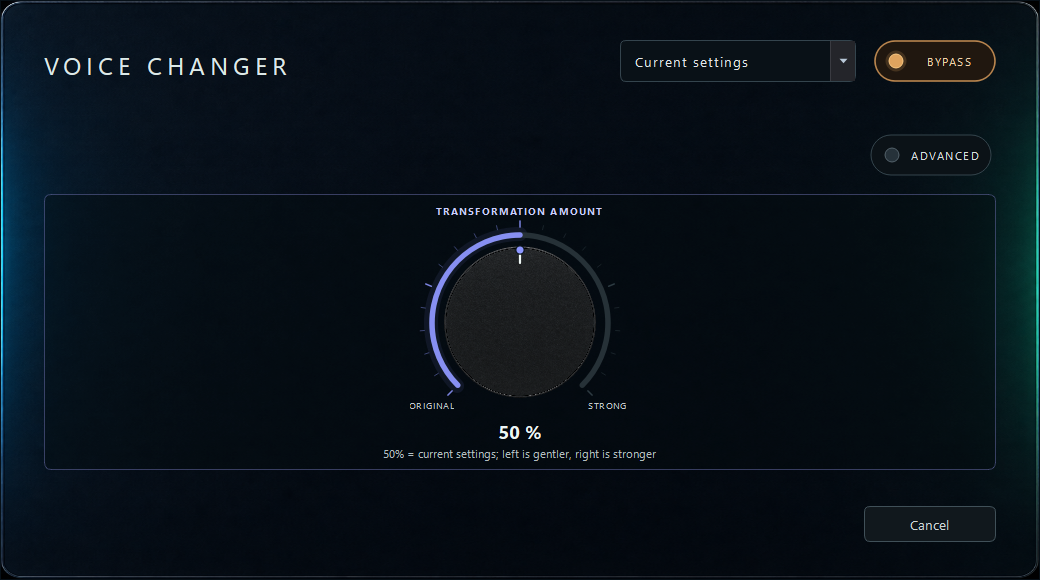
Supported effects offer a One Knob Simple view. First choose a starting point from the Presets menu to the left of Bypass, then use the central knob to make the effect lighter or stronger. At 50%, the selected preset is reproduced exactly; the endpoints are effect-specific safe ranges, not a universal Dry/Maximum scale.
One Knob uses one simple control to adjust several internal parameters of that effect at the same time.
| Group | Effect | Main purpose |
|---|---|---|
| Utility | Input Gain | Set the level entering the chain without clipping its first stage. |
| Cleanup | Background Attenuation | Reduce steady fan or room noise during gaps in the voice. |
| Cleanup | Noise Gate | Close the mic between phrases to reduce keyboard and mouse sounds. |
| Dynamics | Compressor | Reduce the difference between quiet and powerful phrases with Threshold, Attack, and Release. |
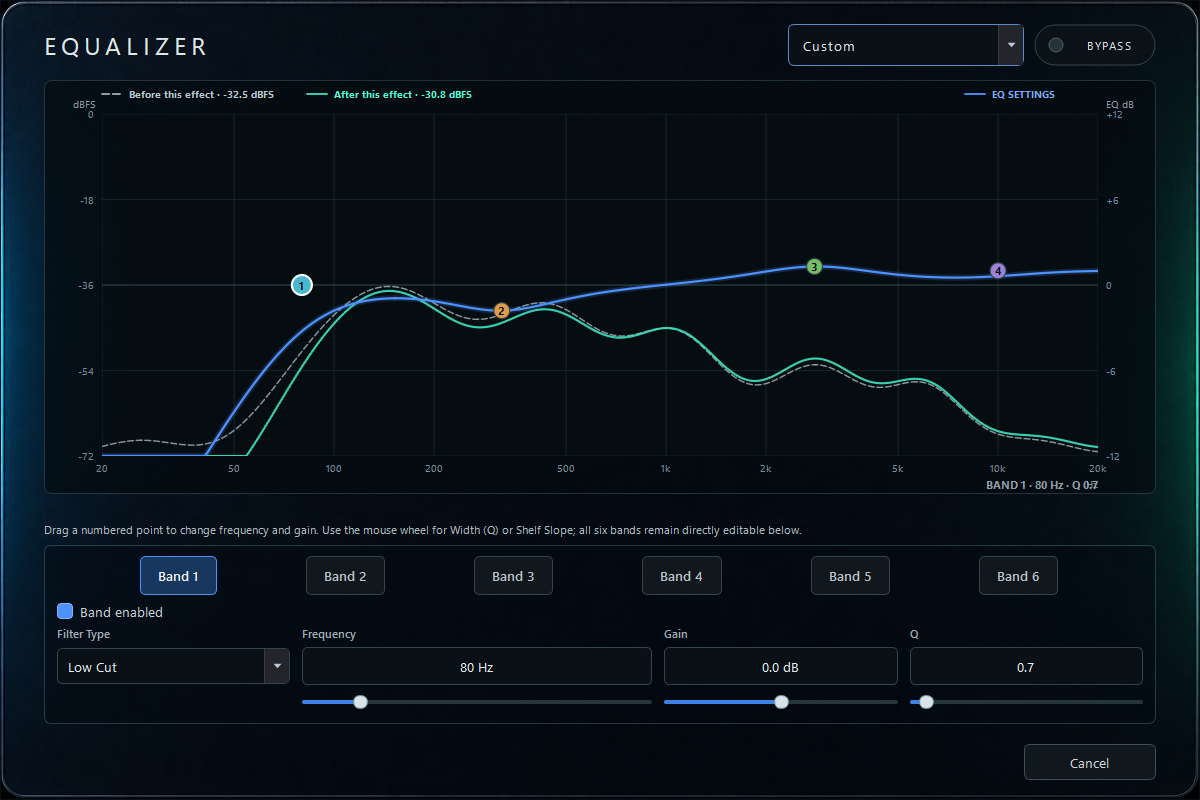
| Tone | Equalizer (EQ) | Remove unnecessary lows, reduce mud, and shape different vocal ranges. |
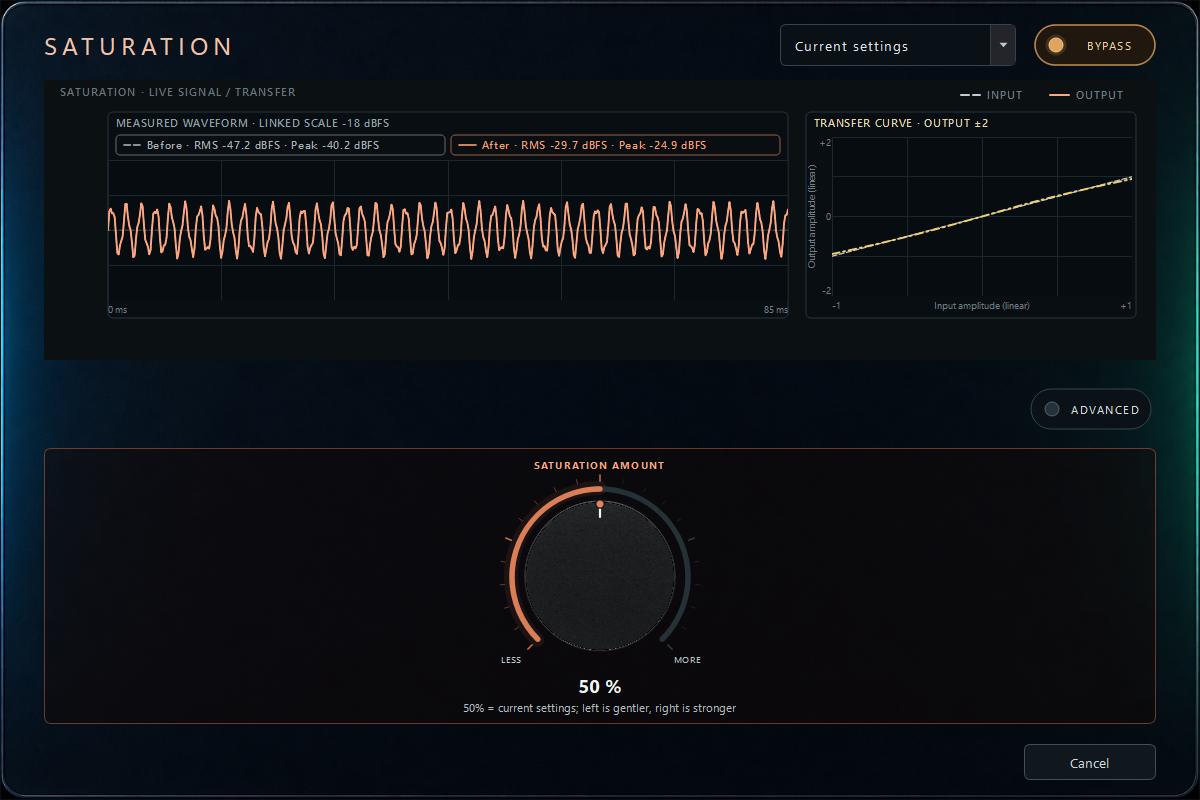
| Tone | Saturation | Add harmonics, density, or controlled edge. |
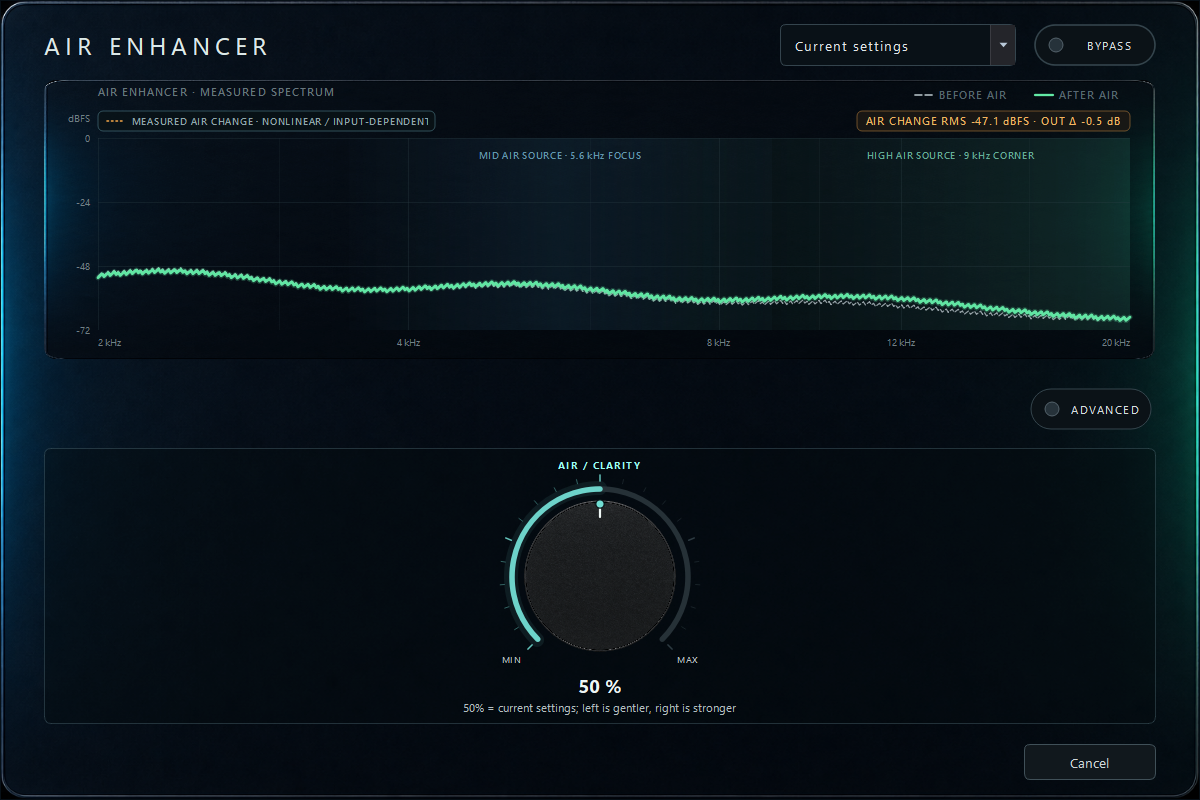
| Tone | Air Enhancer | Add presence, air, and sparkle, then level-match with Trim. |
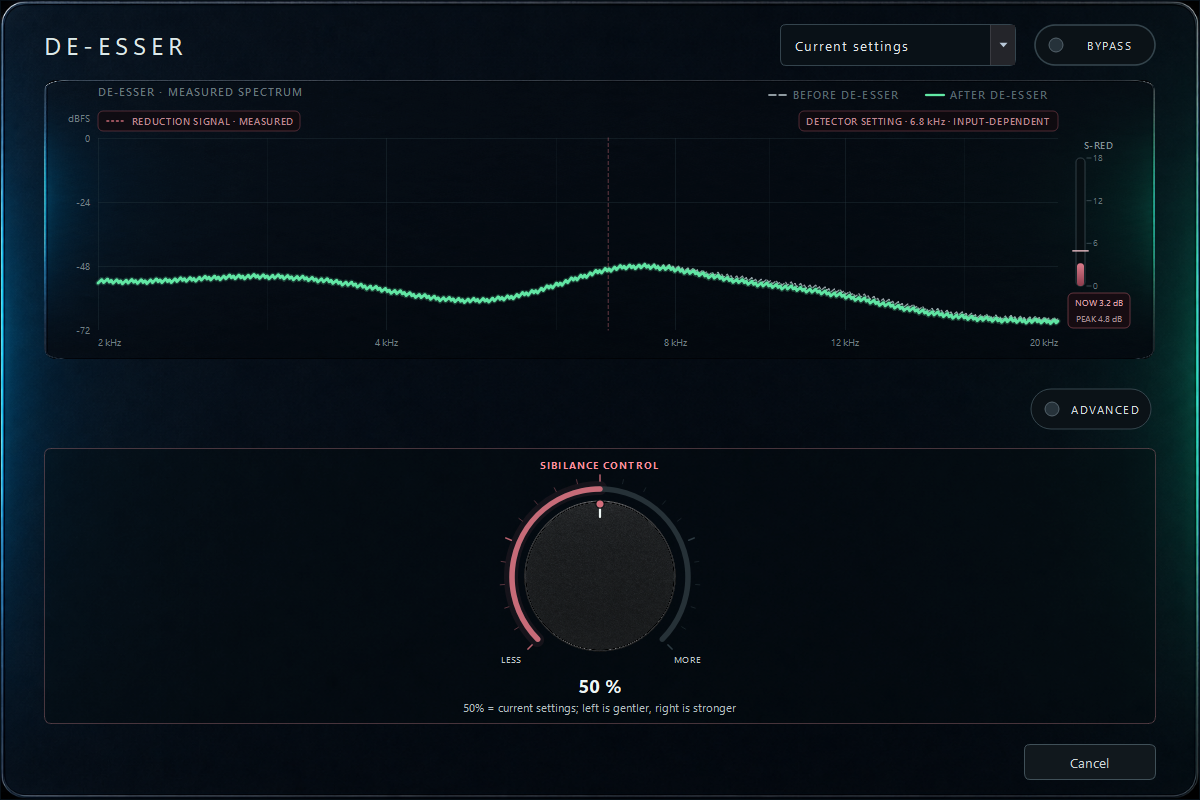
| Cleanup | De-esser | Control harsh S and SH consonants. |
| Creative | Voice Changer | Change Pitch and Formant together for character or section effects. |
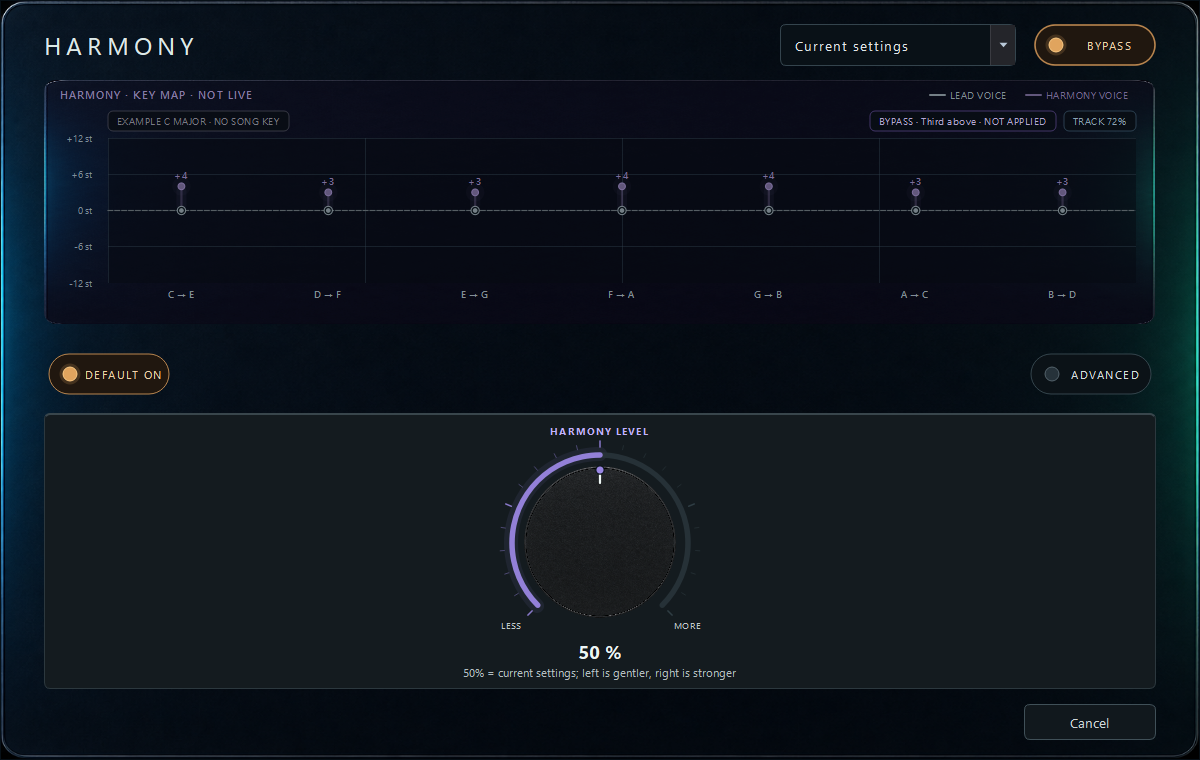
| Pitch & voice | Harmony | Create a key-aware harmony above or below the lead, fading out when tracking is uncertain. |
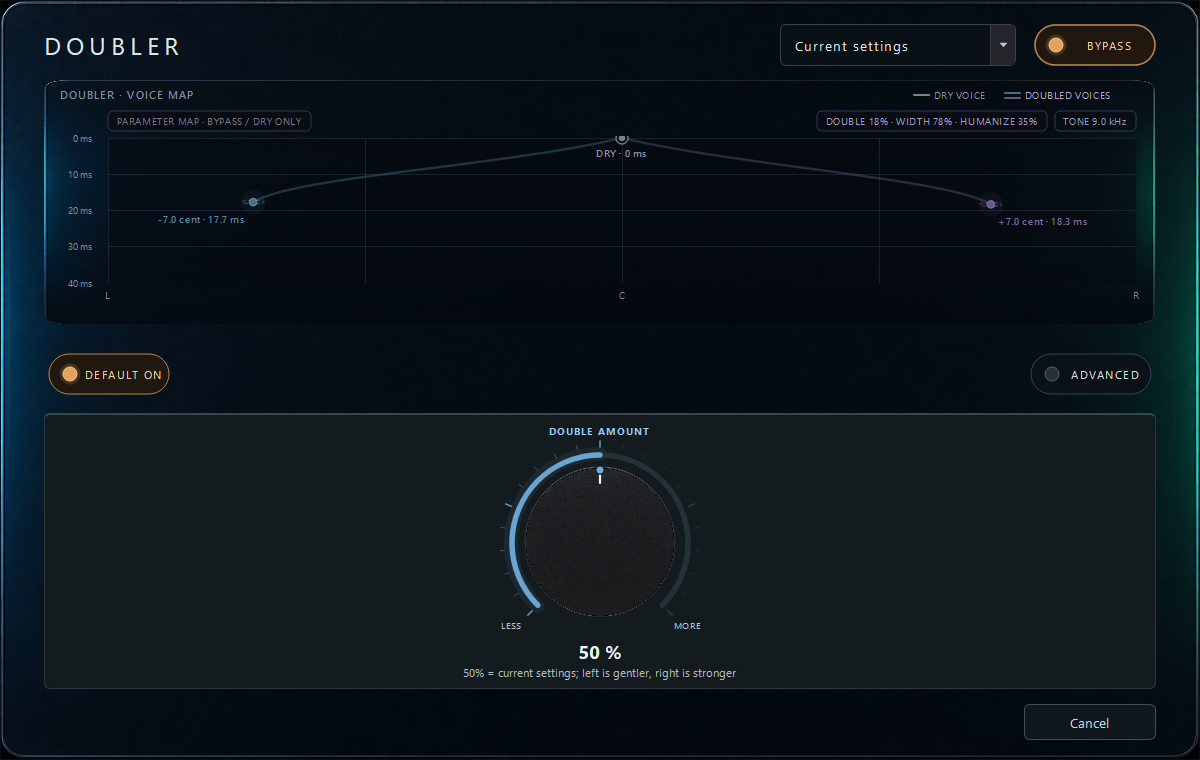
| Pitch & voice | Doubler | Add two short, slightly detuned vocal layers for thickness and stereo width. |
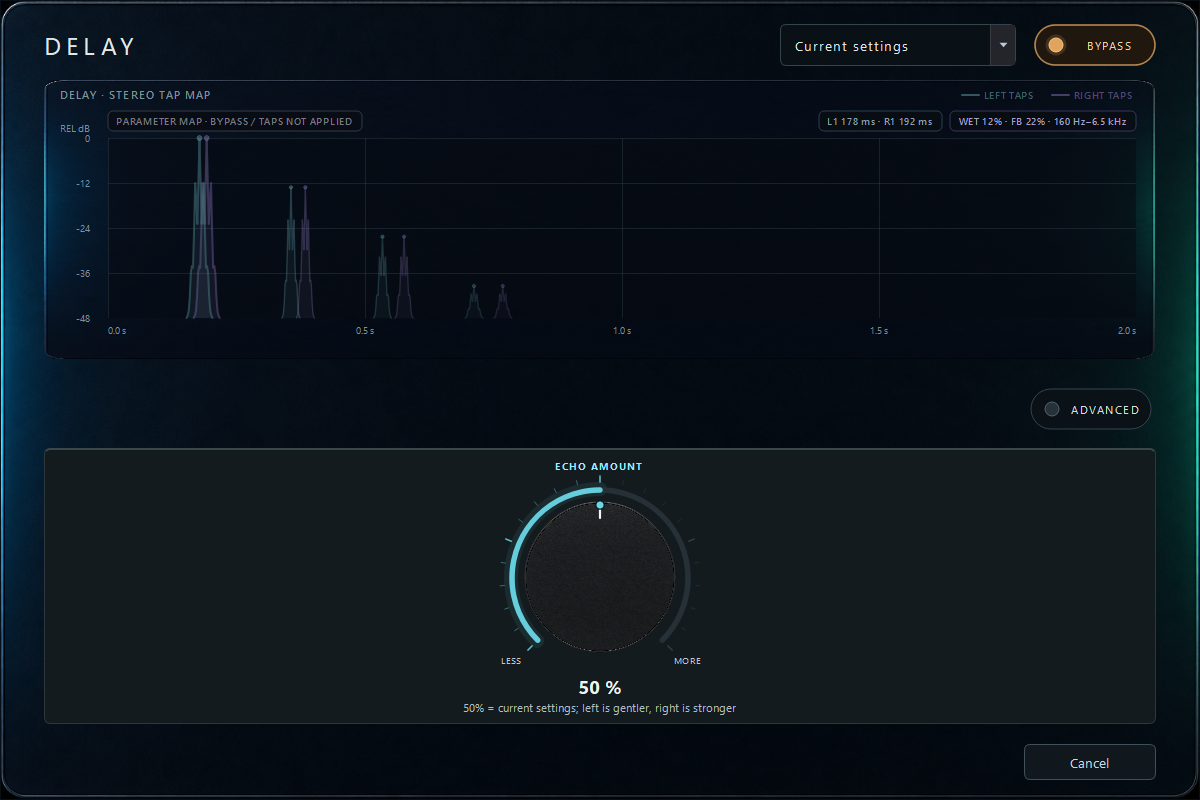
| Space | Delay | Add slap, KTV, or ballad-style echoes. |
| Space | Reverb | Create rooms, plates, or longer airy ambience. |
| Space | Shimmer | Add an octave-up halo to reverb tails for airy sections. |
| Dynamics | Limiter | Catch sudden vocal peaks at the end of a Profile. |
After the Profile, the complete stream still passes through the Mix Bus Compressor, Stream Output Limiter, and Master level. These belong to the overall output chain and do not rewrite the tone of an individual Profile. Final Limiter state is saved separately by mode: it is off by default in Normal Playback, on the first time Advanced Streaming Mode is used, and each mode remembers later manual changes independently.
Open an effect below for its signal role, primary controls, live-singing approach, and failure modes.
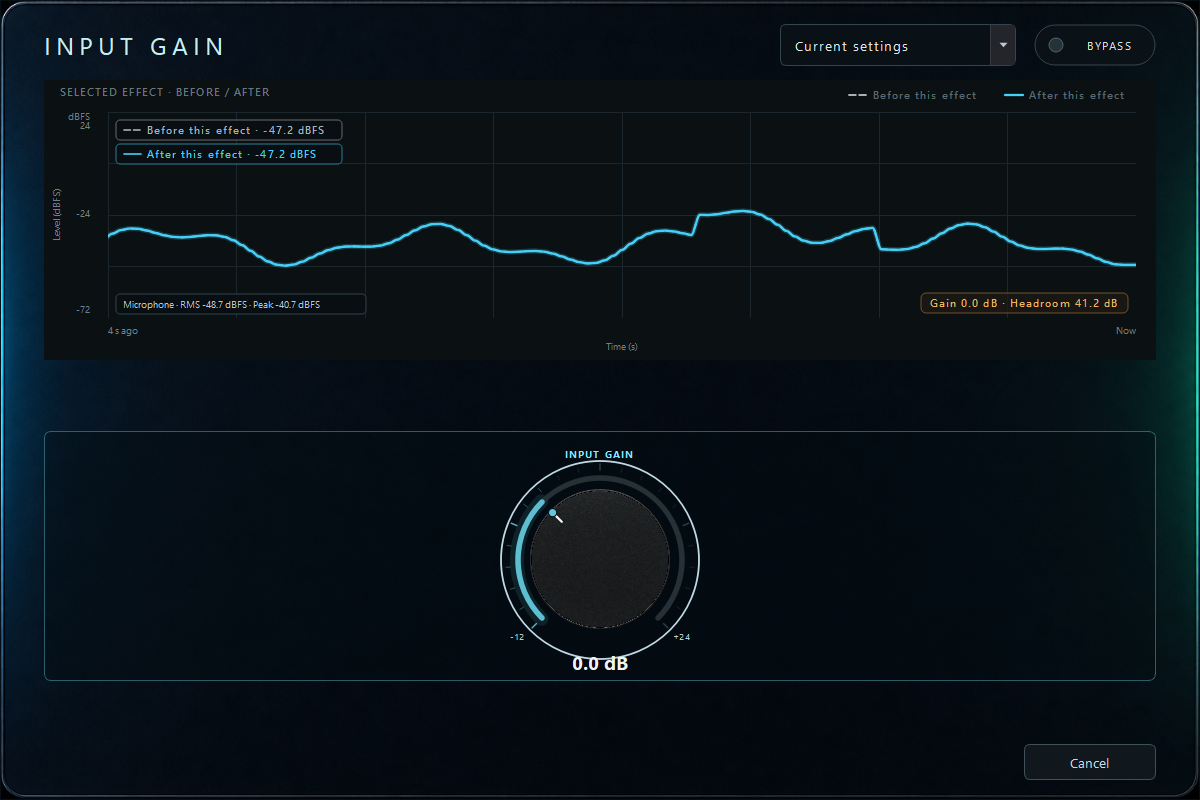
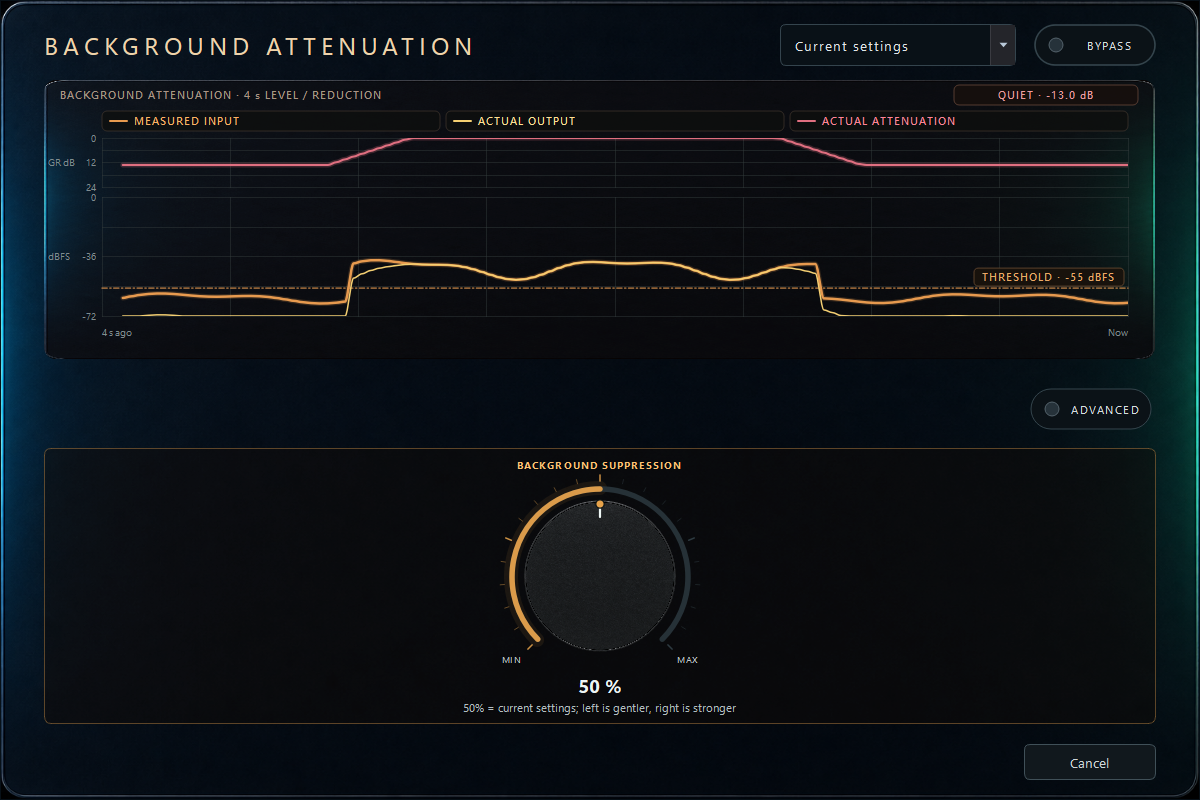
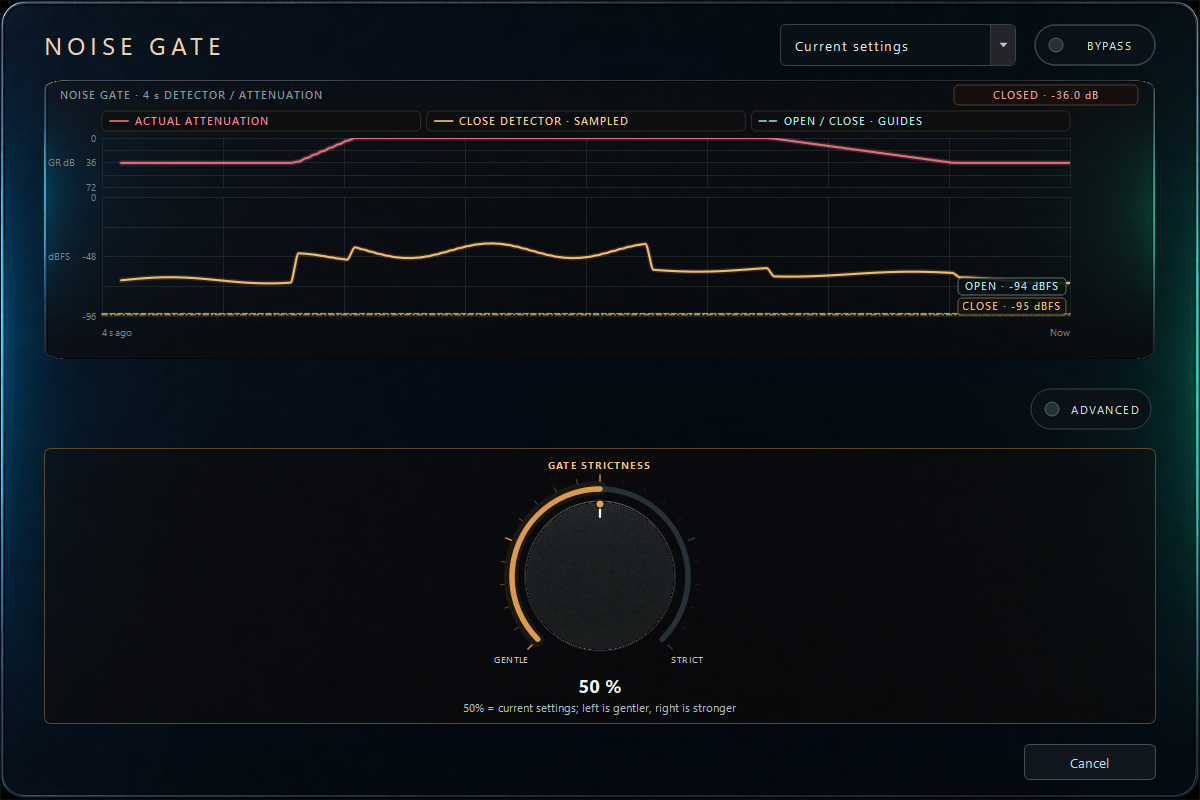
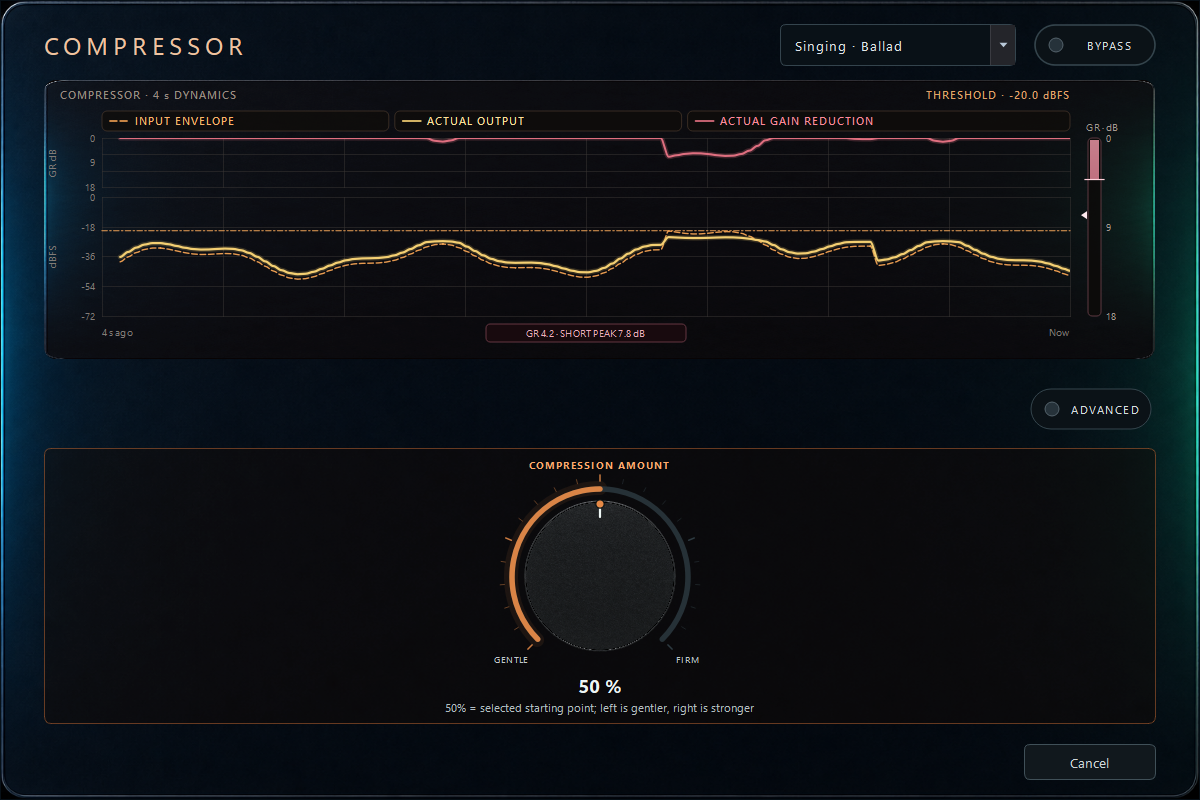
Input GainCalibrate the level entering the Profile
Input Gain sets the internal working level before every other block; it does not replace the hardware preamp.
Live singingStart near 0 dB after setting the interface gain, then test the quietest and loudest passages while leaving headroom for EQ and compression.
Watch forIt cannot repair a signal clipped before the app. Excess gain overloads later blocks and changes Gate behavior.
- Gain: raise or lower the whole Profile input.
Background AttenuationReduce steady room noise between vocal phrases
A smooth downward expander lowers fans, air conditioning, and room tone during quieter moments without fully closing the mic.
Live singingKeep breaths and soft endings intact, then increase Maximum Reduction gradually; it is usually a gentle cleanup stage before the Gate.
Watch forIt cannot separate noise that occurs with the voice. A high Threshold or fast closing action makes weak notes pump or disappear.
- Maximum Reduction: deepest quiet-section attenuation.
- Threshold: level below which attenuation begins.
- Open / Close: recovery and fade-down speeds.
Noise GateClose the mic between phrases
Separate Open and Close thresholds prevent the Gate from chattering around one boundary.
Live singingMeasure room noise, then test breathy starts, consonants, and long phrase endings. More Hold and Release is often safer than simply raising the thresholds.
Watch forA Gate does not remove keyboard noise during singing. Tight settings cut breaths and tails. Detector HPF changes detection only, not the audible vocal tone.
- Open / Close Threshold: enter and leave the open state.
- Attack, Hold, Release: opening, retained-open time, and closing shape.
- Closed Reduction: attenuation while closed.
- Detector HPF: ignore low-frequency vibration in detection.
CompressorControl the difference between quiet and powerful phrases
Above Threshold, Ratio reduces further level growth; Makeup restores only the output level you need.
Live singingAim for moderate gain reduction on normal peaks, preserve the consonant attack, and compare at matched loudness before adding Makeup.
Watch forVery fast Attack dulls articulation, short Release pumps, and too much Makeup raises noise. Continuous heavy reduction is not loudness normalization.
- Threshold / Ratio: where and how strongly compression begins.
- Attack / Release: response and recovery times.
- Makeup: post-compression gain.
- Knee: transition around Threshold.
Equalizer (EQ)Remove unwanted frequencies and place the vocal in the mix
Six bands provide Low Cut, Shelf, Bell, and High Cut shapes with draggable or numeric control.
Live singingRemove unusable sub-bass first, then make broad, small cuts for mud and a restrained presence lift so the vocal reads over accompaniment without simply becoming louder.
Watch forNarrow high-Q boosts exaggerate resonances and feedback. Fixed “male/female” frequency recipes cannot replace listening to the singer, mic, and room.
- Type / Frequency: filter shape and target area.
- Gain / Q: amount and bandwidth.
- Band Bypass: compare one band without deleting it.
SaturationAdd harmonics, density, or deliberate edge
Warm Vocal, Rock Edge, and Metal Bite move from subtle harmonic density to more obvious nonlinear grit.
Live singingBegin with low Drive and Mix for ordinary vocals; increase gradually for rock or screamed sections, then level-match with Output Trim.
Watch forLouder is easily mistaken for better. Excess Drive and Color amplify sibilance and noise, blur consonants, and consume limiter headroom.
- Type: choose the nonlinear curve.
- Drive / Color: intensity and character.
- Mix: processed-to-direct balance.
- Output Trim: match bypass level.
Air EnhancerAdd presence, breath, and high-frequency sheen
Mid Air emphasizes vocal presence; High Air adds the upper sheen and breathiness associated with a brighter capture.
Live singingUse a little Mid Air for lyric intelligibility, then add High Air conservatively. Pairing it with De-esser is often more natural than a large treble boost.
Watch forIt also exposes hiss, room noise, and sibilance. Match Output Trim before deciding that the result is clearer.
- Mid Air: presence and definition.
- High Air: breath and sheen.
- Output Trim: level match and headroom.
De-esserReduce harsh S and SH consonants
De-esser attenuates the selected high-frequency region only while sibilance becomes dominant.
Live singingUse lyrics that reliably trigger sibilance and stop when harshness falls but consonants remain clear; placement after Air or bright EQ can catch the brightness those blocks add.
Watch forA low Threshold or excessive Maximum Reduction produces a lisp or dull vocal. The correct frequency depends on singer and microphone.
- Frequency / Threshold: detection region and sensitivity.
- Maximum Reduction: attenuation limit.
- Attack / Release: catch and recovery timing.
Voice ChangerShift pitch and formant for character effects
Independent Pitch and Formant controls can change the note while adjusting perceived vocal-tract size.
Live singingBegin with small semitone and Formant moves or blend with Mix; select the nearest vocal range to help stable analysis.
Watch forLarge shifts sound synthetic and may increase Profile latency. This is a creative effect, not an anonymity or identity-protection tool.
- Pitch: semitone shift.
- Formant: perceived vocal-tract size.
- Mix: shifted-to-direct balance.
- Vocal Range: analysis aid, not output pitch.
Harmony (experimental)Create a key-aware supporting voice
Harmony follows the song Key/mode and lead pitch to generate diatonic thirds or octaves, fading when tracking confidence is insufficient.
Live singingConfirm the Key, use a low Mix for choruses or held notes, darken the harmony with Tone, and place it behind the lead with Width and Humanize.
Watch forA wrong Key, slides, screams, or unstable notes can confuse tracking. This is experimental and should not overpower the lead.
- Direction: third above/below or octave above/below.
- Mix / Width: level and stereo spread.
- Humanize / Tone: variation and brightness.
- Tracking: pitch and Key confidence requirement.
DoublerBuild double-tracked width and thickness
Two slightly delayed and detuned layers imitate repeated takes rather than a distinct rhythmic echo.
Live singingUse lower Mix in verses and switch to more width in a chorus; short Delay, slight Detune, and moderate Width are usually the most natural.
Watch forLarge Delay or Mix blurs consonants. Extreme width may become thin in mono, so check both stereo and mono before streaming.
- Mix / Delay / Detune: level, timing, and cents offset.
- Width: stereo placement.
- Humanize / Tone: variation and brightness.
DelayAdd slap, KTV, or rhythmic echoes
The direct voice stays in place while Time creates repetitions; short settings produce slap and longer settings create audible echoes.
Live singingChoose Time to suit the song, filter echoes darker and thinner than the lead, and keep Wet and Feedback conservative for clear lyrics.
Watch forHigh Feedback accumulates for a long time or approaches runaway; one millisecond setting will not land on the beat at every tempo.
- Wet / Time: echo level and interval.
- Feedback: number and persistence of repeats.
- Width: left/right timing spread.
- Low / High Cut: clean and darken repeats.
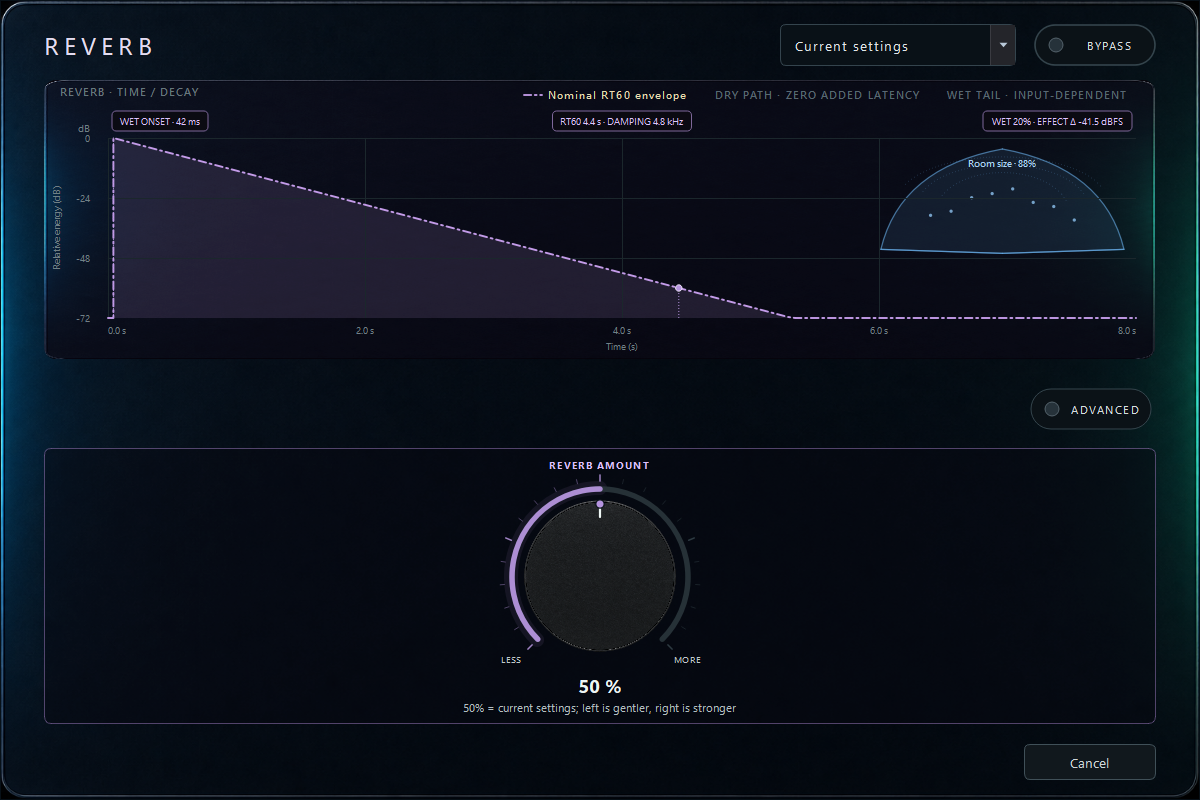
ReverbCreate rooms, plates, or long ambience
Dense reflections establish depth; Pre-delay separates the lead from the tail, while Size, Decay, and Damping define the space.
Live singingUse Pre-delay to retain articulation, then set Decay and Wet. Chat Profiles need a short, low ambience; airy styles can be longer while keeping the lead forward.
Watch forA reflective real room plus long Reverb quickly loses clarity. Excess Wet and Decay mask the next phrase and make Gate transitions obvious.
- Wet / Pre-delay: amount and onset separation.
- Size / Decay: space scale and tail length.
- Damping: bright or dark tail.
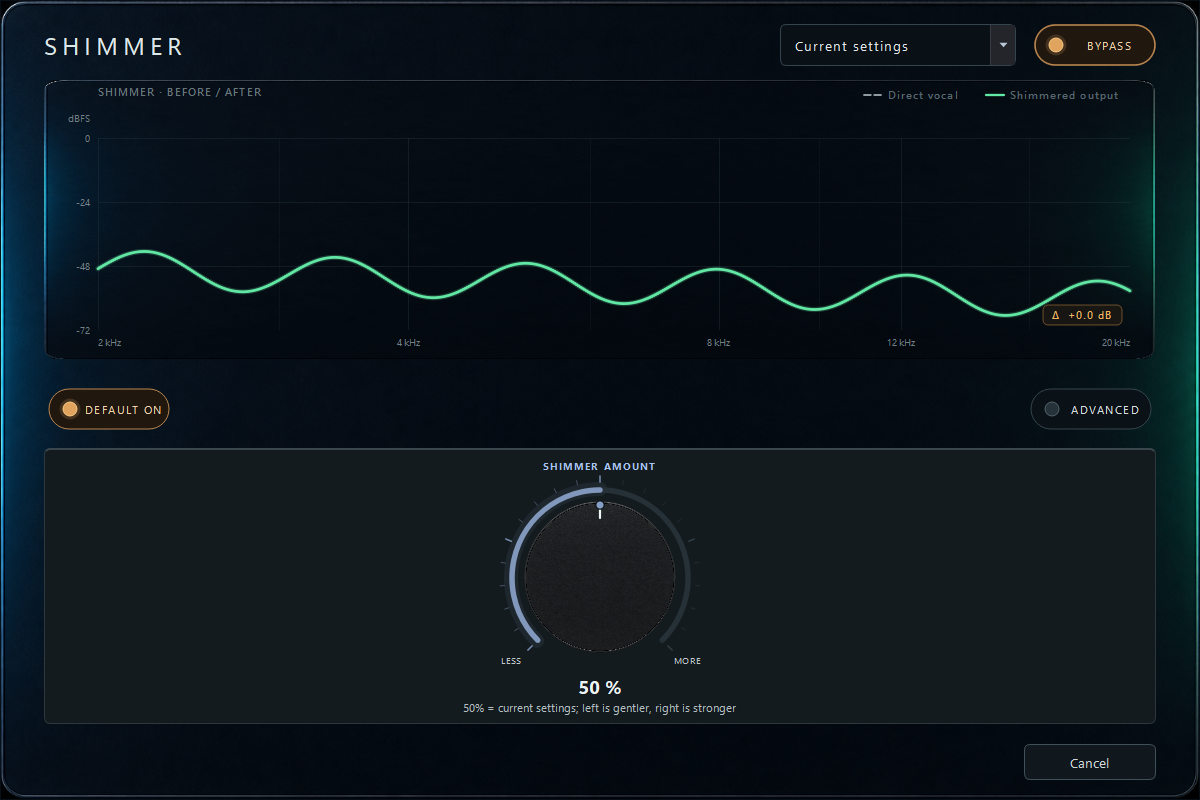
ShimmerAdd an octave-up halo to the reverb tail
Shimmer pitch-shifts the tail upward and feeds it back; Ducking lowers the effect under active singing and lets it bloom in gaps.
Live singingStart with low Wet, controlled Feedback, darker Tone, and enough Ducking for intelligible lyrics. Store the Profile default, then use the global Switch for a chorus.
Watch forBright tails build quickly. Block Bypass, Profile default state, and the temporary song Switch are separate controls.
- Wet / Pre-delay / Decay: level, onset, and tail.
- Feedback / Tone: buildup and brightness.
- Ducking: suppress the halo under the lead.
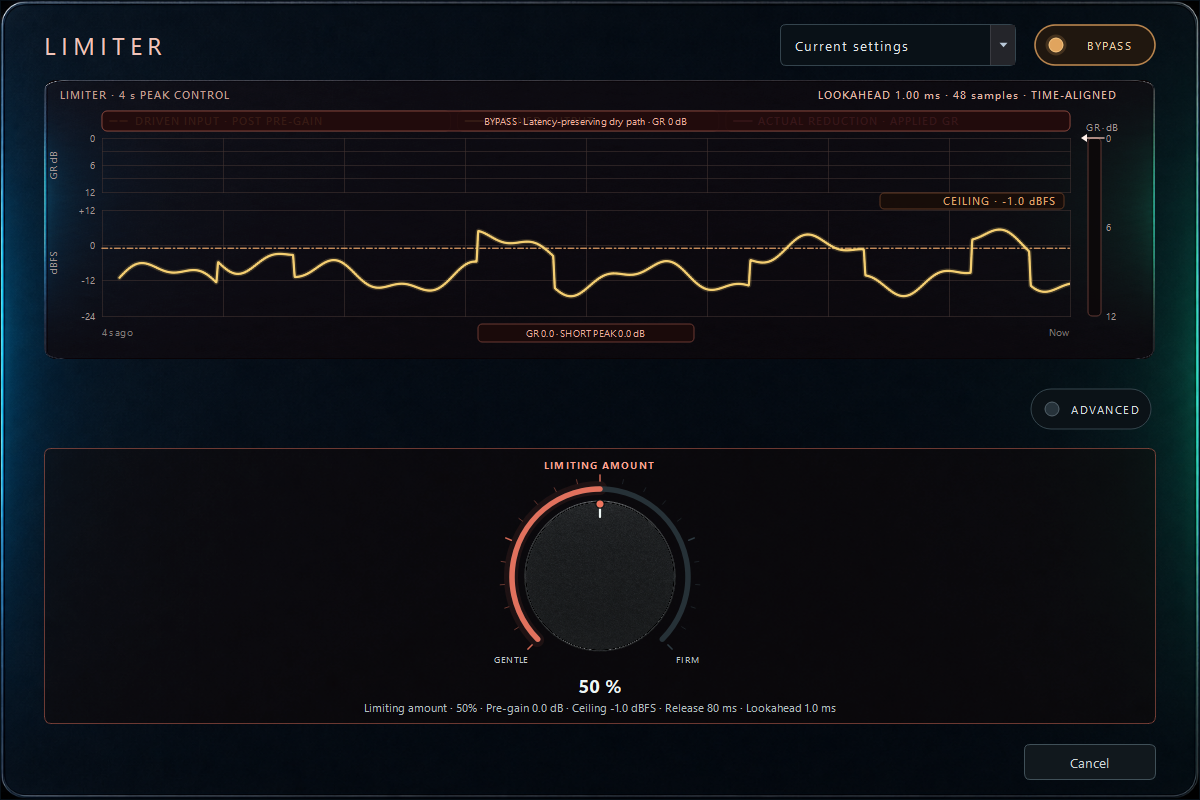
LimiterCatch occasional vocal peaks at the Profile output
The Profile Limiter and Output Final Limiter are stereo-linked, lookahead sample-peak limiters, not true-peak limiters. Lookahead anticipates stored sample peaks; it does not reconstruct inter-sample peaks and is not True Peak.
Live singingUse the Profile Limiter as occasional peak protection, not constant heavy compression. The separate Final Limiter protects the formal Mix; its default −1.0 dBFS ceiling leaves pre-encode margin.
Watch forA −1.0 dBFS sample-peak ceiling does not guarantee AAC, resampling, or reconstruction remains below −1.0 dBTP. Use a true-peak-capable downstream tool when dBTP compliance is required.
- Input Gain / Ceiling: drive and stored-sample limit.
- Release: recovery after a peak.
- Lookahead: preview sample peaks; adds Profile latency but not true-peak detection.
Performance Switch, saved defaults, and song Key
Shimmer, Doubler, and Harmony share the Profile Effect Switch workflow. A block’s Bypass removes that processor from the chain; its Default on/off value decides how a newly applied Profile or song starts; the global shortcut or tray Switch changes only the current song and never rewrites that saved default. Reapplying the Profile restores its saved starting state.
Song Key analysis can run in the background. Hover over the player’s Pitch button to see the detected original key, confidence, and the key after transposition, or correct it manually. When a song selects a Profile that contains Harmony, the app schedules one analysis automatically. Low confidence, key changes, and non-standard tuning still require an ear check.
VOICE CHAIN
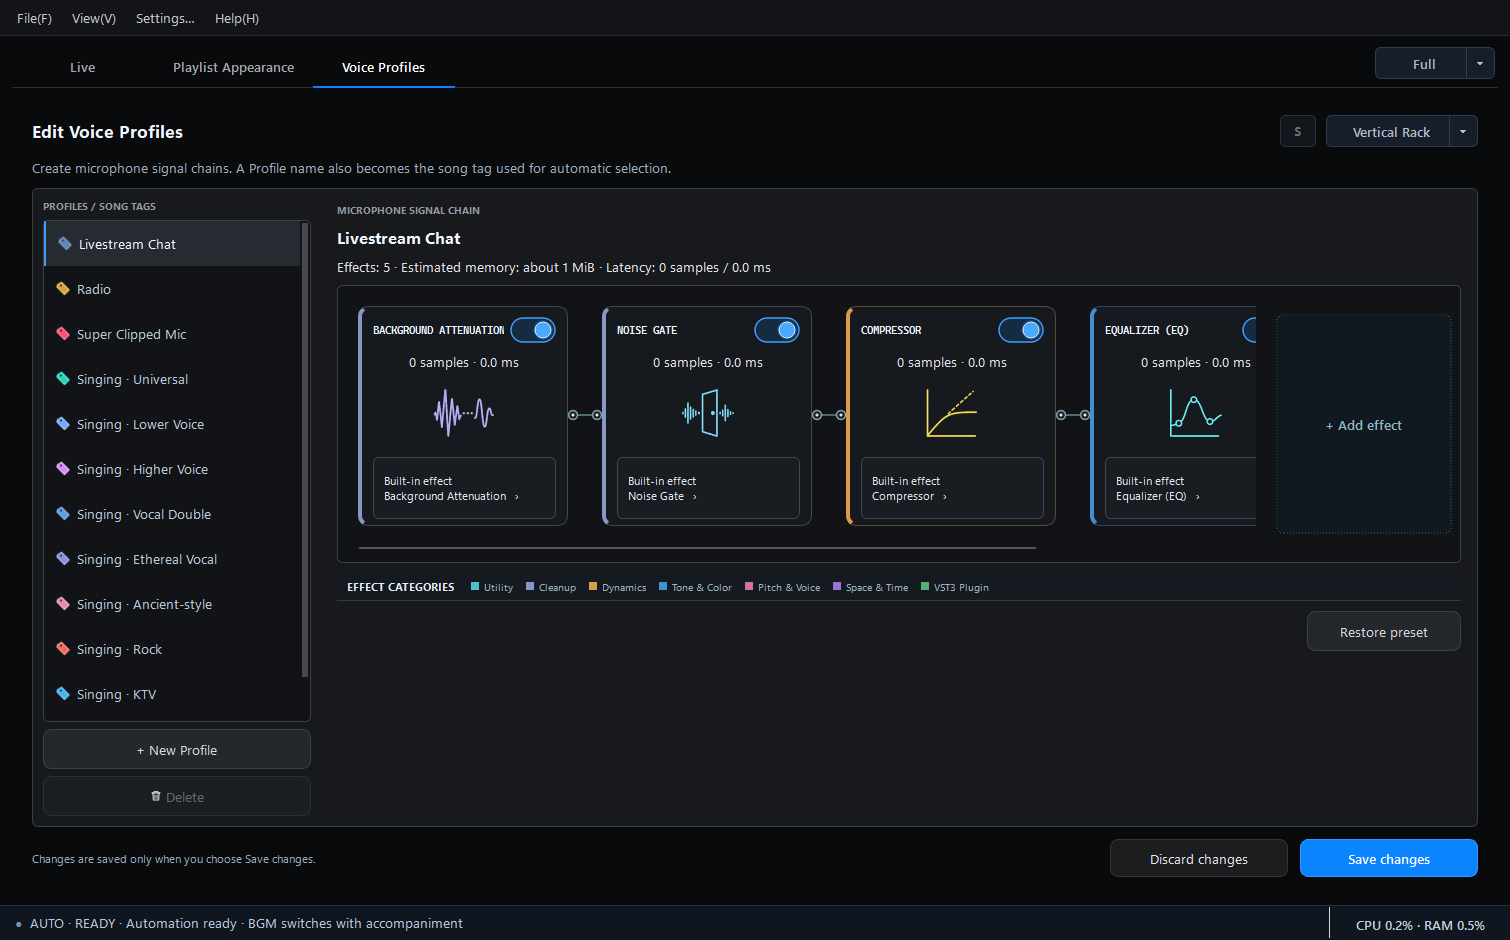
Profile examples
Separate chat, singing range, genre, and special-effect chains so they can be recalled instead of rebuilt during a live stream.
SONG AUTOMATION
Switch Profiles automatically with song tags
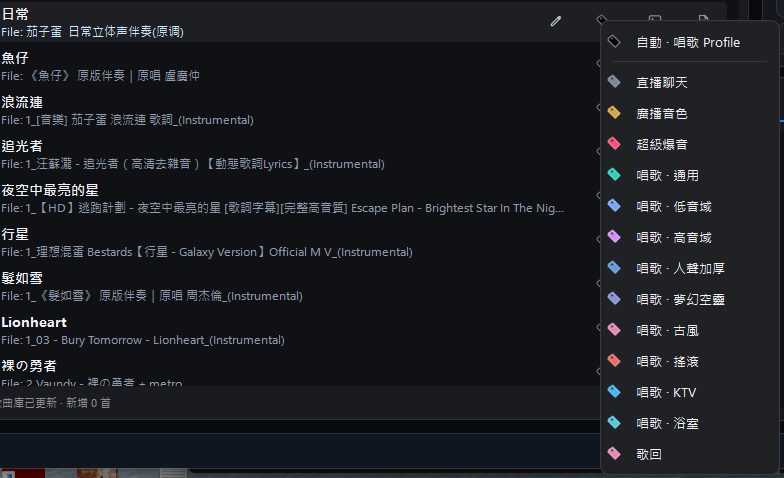
Use the tag button in the song list to assign a voice Profile. Playing that accompaniment automatically activates its effect chain. Automatic · Singing Profile uses the current default singing Profile.
LIVE CONTROL
Switch effects and mute the microphone manually
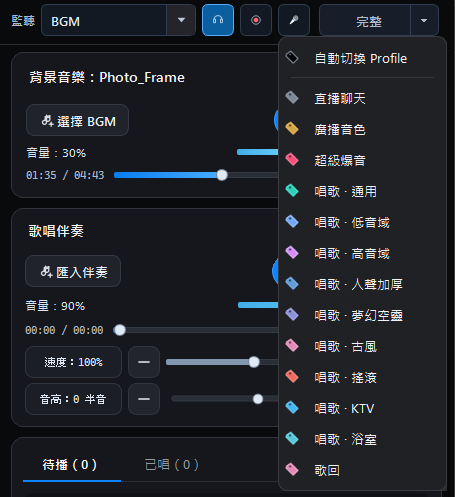
The workspace toolbar can apply any Profile immediately or return control to song-tag automation. The nearby microphone button mutes or unmutes the microphone; check the meters on the routing page after switching.
What each top-bar control does
- Monitor source selects BGM/accompaniment, the full mix, BGM plus wet voice, BGM plus dry voice, or the processed microphone alone.
- The headphones button toggles the selected monitor without forgetting the source.
- Left-click the record button to start or stop immediately; right-click it to open the menu for full output or monitor content, WAV format, and the recording folder.
- Left-click the microphone button to mute or restore the mic; right-click it to open the Profile menu and select a chain or resume automatic switching. Its state icon matches the tray menu.
- The Profile menu applies a chain manually or returns control to Automatic Profile Switching.